MCP Guide

What the heck is MCP?⌗
MCP is a tool that gives your AI actual capabilities. It’s like attaching hands to AI. Instead of just generating text, your AI can now read files, execute commands, call functions, and interact with your system.
What does that even mean?⌗
Let’s think practically.
You have a Python script that processes data. With MCP, AI can execute that script and work with the results. No more manual work of feeding data to AI, it can take what it needs with MCP.
Normal AI: helps you understand topics, generates code, creates text and images. MCP-enabled AI: reads files automatically, writes to disk, executes scripts, controls your system, just by asking in natural language.
Want to see it in action?⌗
We’ll build a simple system info tool with two functions: one gets kernel and memory info, another searches packages. ( Yeah it’s simple, but it can help you understand how MCP works ).
Install MCP SDK⌗
pnpm i @modelcontextprotocol/sdk
Import dependencies⌗
#!/usr/bin/env node

const { Server } = require("@modelcontextprotocol/sdk/server/index.js");
const { StdioServerTransport } = require("@modelcontextprotocol/sdk/server/stdio.js");
const { CallToolRequestSchema, ListToolsRequestSchema } = require("@modelcontextprotocol/sdk/types.js");
const { exec } = require("child_process");
const { promisify } = require("util");

const execAsync = promisify(exec);
Initialize server⌗
const server = new Server(
  {
    name: "system-utils-mcp",
    version: "0.1.0",
  },
  {
    capabilities: { tools: {} },
  }
);
Command execution helper⌗
This is a helper function that executes a command and returns its output. Actually it’s a tool that can be called by your AI with different commands. Instead of this we can have an FileReader tool that can read files, or anything that an script can does. Yeah, it’s mind blowing :)
async function executeCommand(command) {
  try {
    const { stdout, stderr } = await execAsync(command);
    return { stdout, stderr, success: true };
  } catch (error) {
    return {
      stdout: error.stdout || "",
      stderr: error.stderr || error.message,
      success: false,
    };
  }
}
Define tools⌗
This is the list of tools and its metadata defining it’s capabilities that your AI can use. Basically it’s a list of functions that is exposed and can be called by your AI. We can say it a menu card for your AI.
const tools = [
  {
    name: "system_info",
    description: "Get kernel version and memory usage",
    inputSchema: {
      type: "object",
      properties: {},
    },
  },
  {
    name: "package_search",
    description: "Search for packages in repos",
    inputSchema: {
      type: "object",
      properties: {
        query: {
          type: "string",
          description: "Package name to search",
        },
      },
      required: ["query"],
    },
  },
];
Handle tool requests⌗
Now let’s define handlers for tool requests. This is where we actually do the work. We can say it a function that is called when a tool is called by your AI.
server.setRequestHandler(ListToolsRequestSchema, async () => {
  return { tools };
});

server.setRequestHandler(CallToolRequestSchema, async (request) => {
  const { name, arguments: args } = request.params;

  switch (name) {
    case "system_info": {
      const [kernel, memInfo] = await Promise.all([
        executeCommand("uname -r"),
        executeCommand("free -h"),
      ]);

      return {
        content: [{
          type: "text",
          text: JSON.stringify({
            kernel: kernel.stdout.trim(),
            memory: memInfo.stdout,
          }, null, 2),
        }],
      };
    }

    case "package_search": {
      const { query } = args;
      const result = await executeCommand(`pacman -Ss ${query} | head -20`);

      return {
        content: [{
          type: "text",
          text: result.success ? result.stdout || "No packages found" : `Error: ${result.stderr}`,
        }],
      };
    }

    default:
      return {
        content: [{ type: "text", text: `Unknown tool: ${name}` }],
        isError: true,
      };
  }
});
Start the server⌗
Now let’s start the server.
async function main() {
  const transport = new StdioServerTransport();
  await server.connect(transport);
  console.error("System Utils MCP Server running");
}

main().catch((error) => {
  console.error("Fatal error:", error);
  process.exit(1);
});
Connect to your AI client⌗
Here I’m using OpenCode, you can use any AI client that supports MCP like gemini-cli, codex, claude-code, etc.
Add to your OpenCode config:
{
  "$schema": "https:opencode.ai/config.json",
  "mcp": {
      "SysUtils": {
          "type": "local",
          "command": ["node", "/path/to/index.js"],
          "enabled": true,
      },
      ......
  },
  "provider": {
      ....
  }
}
Testing⌗
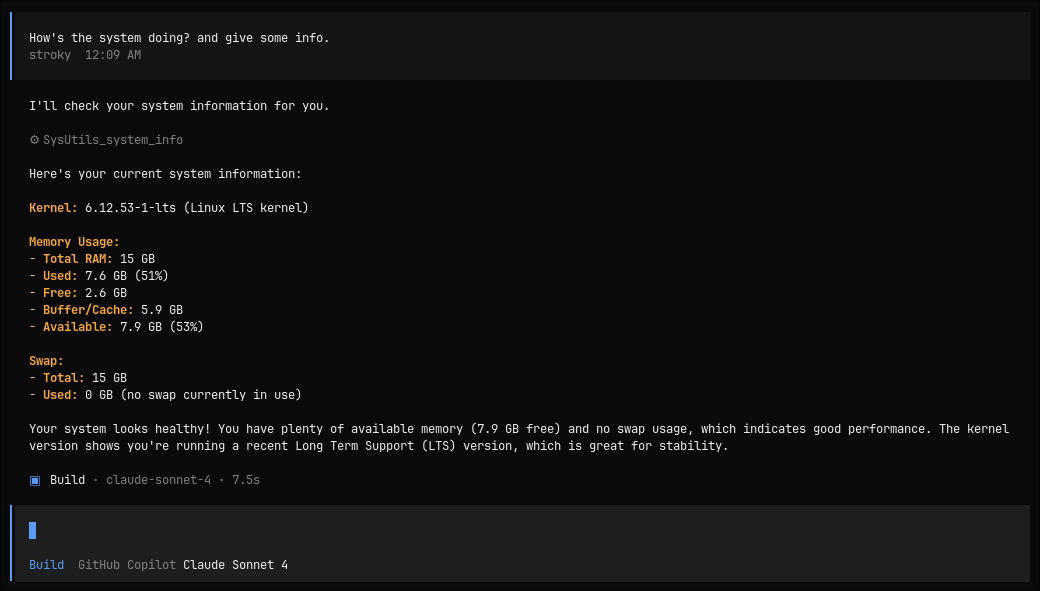
- Connection check

- Get system info
- Search packages
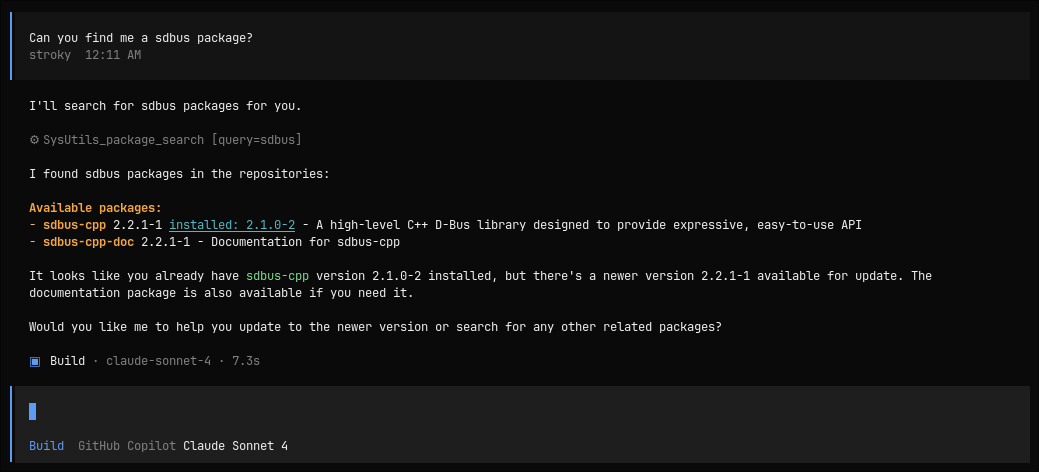
That’s it. Your AI now has direct system access through two simple functions.
This was just an example, you can do whatever you want with MCP. MCP can even help AI to use some sort of software like Figma, TUISIC and it can go wild, just add your software an mcp layer and voila it’s AI compatible.
This is what we say Model Context Protocol (MCP), Making AI work for you.